CLR Integration
Scenarios
The common language runtime (CLR) is the core of Microsoft .NET Framework and provides the execution environment for all .NET Framework code. Code that runs within the CLR is referred to as managed code. The CLR provides various functions and services required for program execution, including just-in-time (JIT) compilation, allocating and managing memory, enforcing type safety, exception handling, thread management, and security.
SQL CLR is a new function of SQL Server 2005. It injects the CLR service of .NET Framework into SQL Server, so that some database objects of SQL Server can be developed using the .NET Framework programming language (currently, only VB.NET and C# are supported). These database objects include stored procedures, triggers, user-defined functions, user-defined types, and user-defined aggregates. To execute the CLR code, you need to enable CLR integration first.
For more information about CLR integration, see Common Language Runtime (CLR) Integration Programming Concepts.
For more information about CLR integration security, see CLR Integration Security.
Prerequisites
RDS for SQL Server can deploy SAFE assemblies only.
Enabling CLR
Log in to the management console.
Click
 in the upper left corner and select a region and a project.
Click Service List. Under Database, click Relational Database Service. The RDS console is displayed.
On the Instances page, click the target DB instance.
In the navigation pane on the left, choose Parameters. On the displayed page, enter clr enabled and clr strict security in the search box in the upper right corner.
Noteclr enabled determines whether the CLR integration is enabled.
clr strict security is a specific parameter to SQL Server 2017. This option controls the interpretation of the SAFE, EXTERNAL ACCESS, and UNSAFE permissions in SQL Server. The value 1 causes the DB engine to ignore the PERMISSION_SET information on the assemblies, and always interprets them as UNSAFE. For more information, see CLR strict security at the Microsoft site.
Set the clr enabled value.
Set clr enabled to 1 and click Save. In the displayed dialog box, click Yes to enable the CLR function.
Noteclr enabled: The value 1 indicates that the CLR function is enabled. The value 0 indicates that the CLR function is disabled.
clr strict security: The default value is 1 and no configuration is required. For SQL Server 2017 DB instances, only clr enabled needs to be set to enable the CLR function.
On the Change History tab, check that the value of clr enabled has been changed to 1.
Creating a SAFE CLR Assembly
The following factors should be considered when you design assemblies:
Packaging assemblies
Management assembly security
Restrictions on assemblies
For more information, see Designing Assemblies.
Example: Creating a C# CLR Assembly
Microsoft SQL Server provides assemblies to make database operations simple and convenient.
When you restore data to a new or an existing DB instance, the clr enabled parameter is disabled by default. To use the CLR integration function, you need to enable clr enabled first.
Procedure
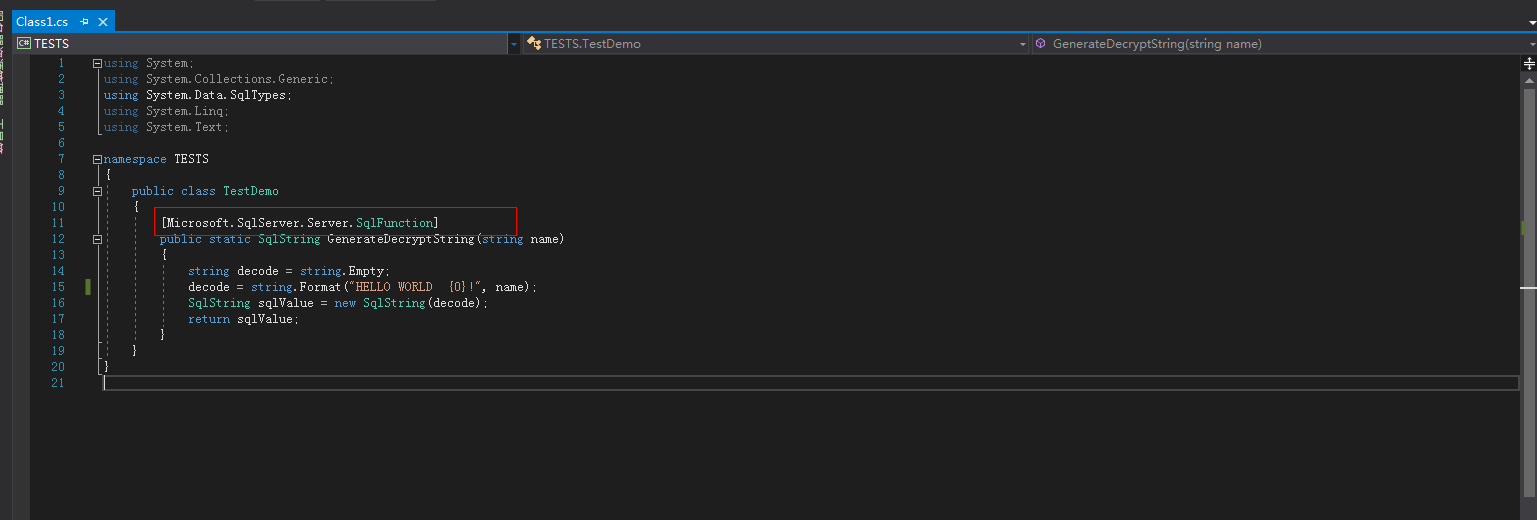
Create a C# function to compile an SQL Server DLL.

Figure 1 C# function code
ImportantFor more information about user-defined functions, see CLR User-Defined Functions.
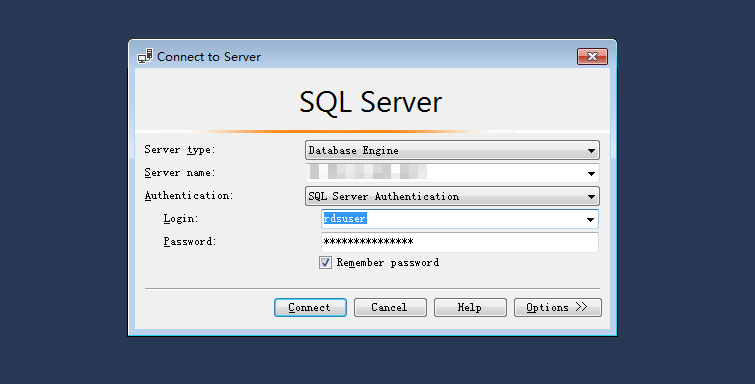
Use SQL Server Management Studio to connect to the database.

Figure 2 Connecting to the server
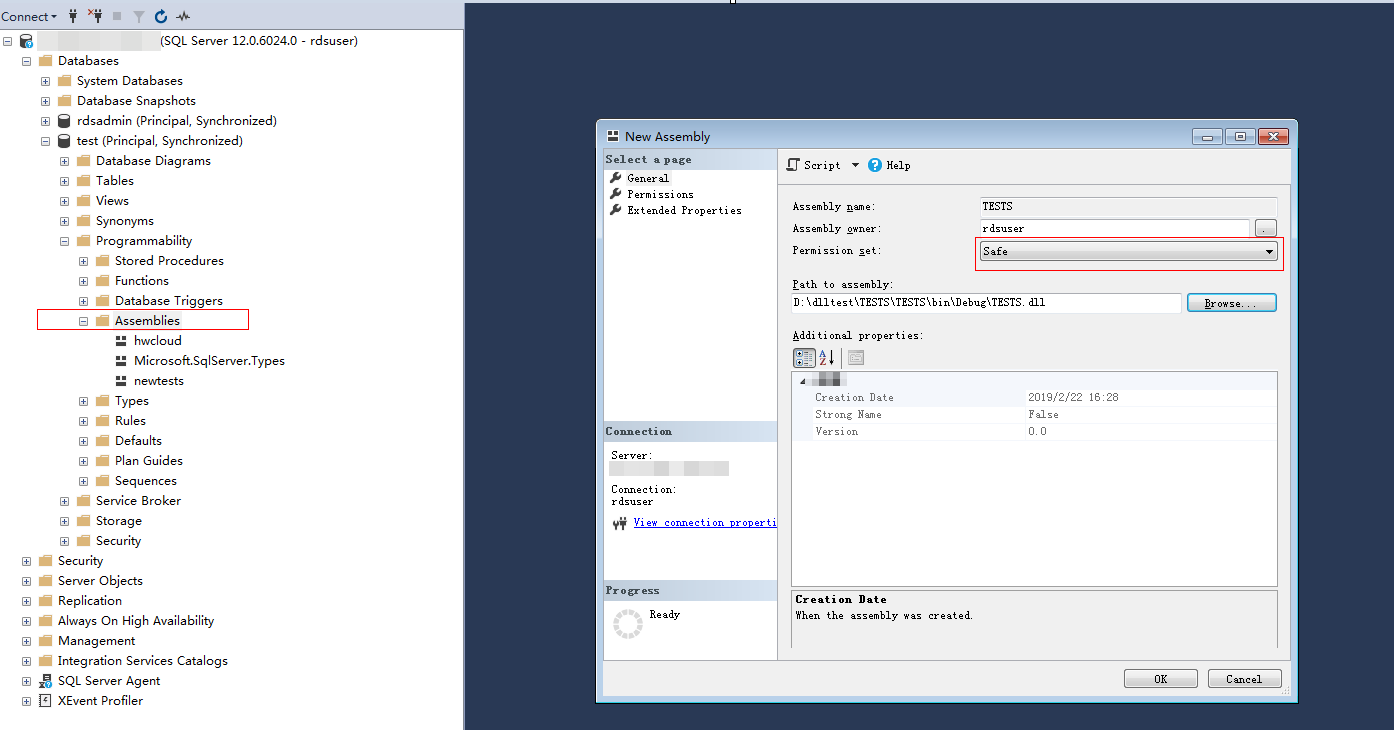
Select the target database and create the corresponding assembly.
NoteOnly the SAFE assembly (Permission set is Safe) can be created.
The DLL file is saved in the hexadecimal format, as shown in Figure 4.

Figure 3 Creating an assembly

Figure 4 DLL file
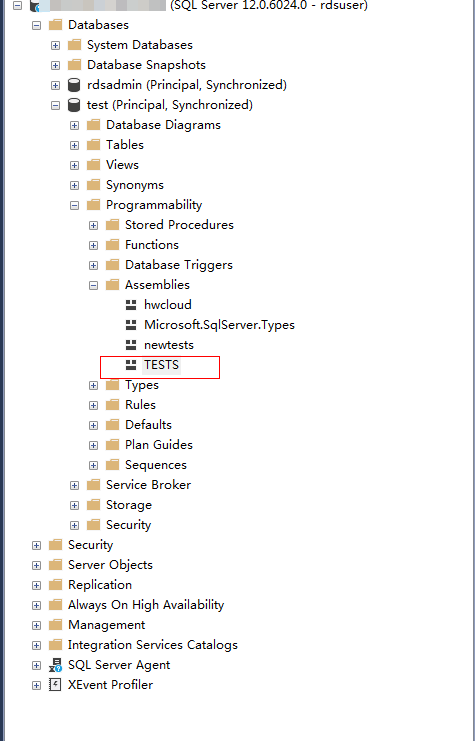
Execute the program. If the execution result is shown as Figure 5, the execution is successful. The TESTS assembly is added, as shown in Figure 6.

Figure 5 Execution result

Figure 6 TESTS assembly