Attaching an EVS Disk to an ECS
Scenarios
If the existing disks of an ECS fail to meet service requirements, for example, due to insufficient disk space or poor disk performance, you can attach more available EVS disks to the ECS, or create more disks (in Storage > Elastic Volume Service) and attach them to the ECS.
Prerequisites
EVS disks are available.
For instructions about how to create an EVS disk, see "Creating an EVS Disk" in Elastic Volume Service User Guide.
Procedure
Log in to the management console.
Click
 in the upper left corner and select your region and project.
Under Computing, click Elastic Cloud Server.
In the search box above the upper right corner of the ECS list, enter the ECS name, IP address, or ID for search.
Click the name of the target ECS.
The page providing details about the ECS is displayed.
Click the Disks tab. Then, click Attach Disk.
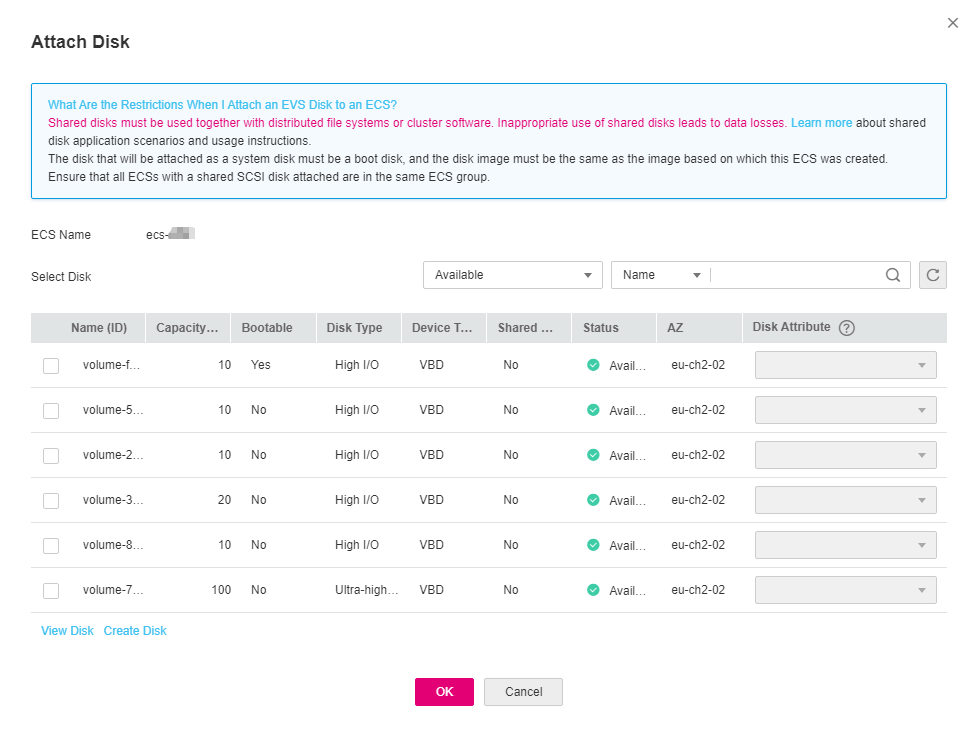
The Attach Disk dialog box is displayed.

Figure 1 Attach Disk
Select the target disk and specify the disk as the system disk or data disk
Note
If no EVS disks are available, click Create Disk in the lower part of the list.
For details about restrictions on attaching a disk, see What Are the Requirements for Attaching an EVS Disk to an ECS?
Click OK.
After the disk is attached, you can view the information about it on the Disks tab.

Figure 2 Viewing the newly attached disk
Follow-up Procedure
If the attached disk is newly created, the disk can be used only after it is initialized.
For instructions about how to initialize a data disk, see Scenarios and Disk Partitions.