Step 2: Associate a Resource with the Vault
If you have already associated servers or disks when creating a vault, skip this step.
After a server backup vault or disk backup vault is created, you can associate servers or disks with the vault to back up these resources.
Prerequisites
A vault can be associated with a maximum of 256 resources.
The servers you plan to associate with a vault must have at least one disk attached.
The vault and the resources you plan to associate with it must be in the same region.
The total size of the resources to be associated cannot be greater than the vault capacity.
Resources can be associated only when they are in the statuses in the table below.
Table 1 Resource statuses available for association¶ Resource Type
Status
Cloud server
Running or Stopped
Cloud disk
Available or In-use
Procedure
Log in to the CBR console.
Log in to the management console.
Click
 in the upper left corner and select a region.
Click
 and choose Storage > Cloud Backup and Recovery. Select a backup type from the left navigation pane.
On a backup page, locate the target vault and click Associate Server or Associate Disk.
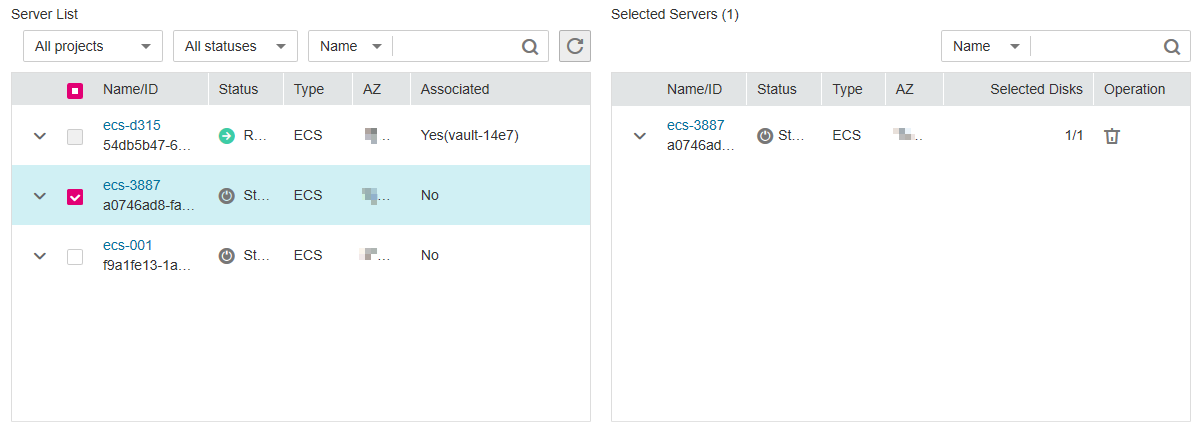
In the resource list, select the resources you want to associate with the vault. After resources are selected, they are added to the list of selected resources. See Figure 1.
Figure 1 Associate Server

Click OK. Then on the Associated Servers tab page, you can view the number of resources that have been associated.
NoteIf a new disk is attached to an associated server, CBR automatically identifies the new disk and includes the new disk in subsequent backup tasks.
Automatic Association
If you enable automatic association for a backup vault, the vault will automatically associate the unprotected resources and back them up according to the backup policy applied to the vault.
The vault's remaining capacity should be greater than both 40 GB and the associated capacity. The vault will automatically scan and associate unprotected servers in the next backup cycle and perform backup. Remaining capacity of a vault = Total capacity of the vault - Capacity of resources associated with the vault. You can obtain the vault's total capacity and associated capacity in the Basic Information area on the details page of the vault. For example, if you have an 800-GB server backup vault and it has been associated with two 100-GB servers, its remaining capacity is 600 GB (800 GB - 200 GB). In this case, the vault will automatically associate unprotected servers in the next backup cycle and perform backup.
If multiple vaults are enabled with automatic association, CBR scans their backup policies and associates resources with the vault whose next scheduled backup time is the earliest.
If the capacity of the first selected vault is used up, resources will be associated with the vault whose next scheduled backup time is the second earliest.
If a backup policy with the earliest scheduled backup time is applied to more than one vault, CBR randomly associates the resources with one of these vaults.
If a vault has automatic association enabled but has no backup policy applied, no resources will be automatically associated with this vault. You can manually associate unprotected resources.
After automatic association is disabled for a vault, the vault stops automatically scanning for unprotected resources. Associated resources are not affected.
Log in to the CBR console.
Log in to the management console.
Click
 in the upper left corner and select a region.
Choose Storage > Cloud Backup and Recovery.
On any backup page, locate the target vault.
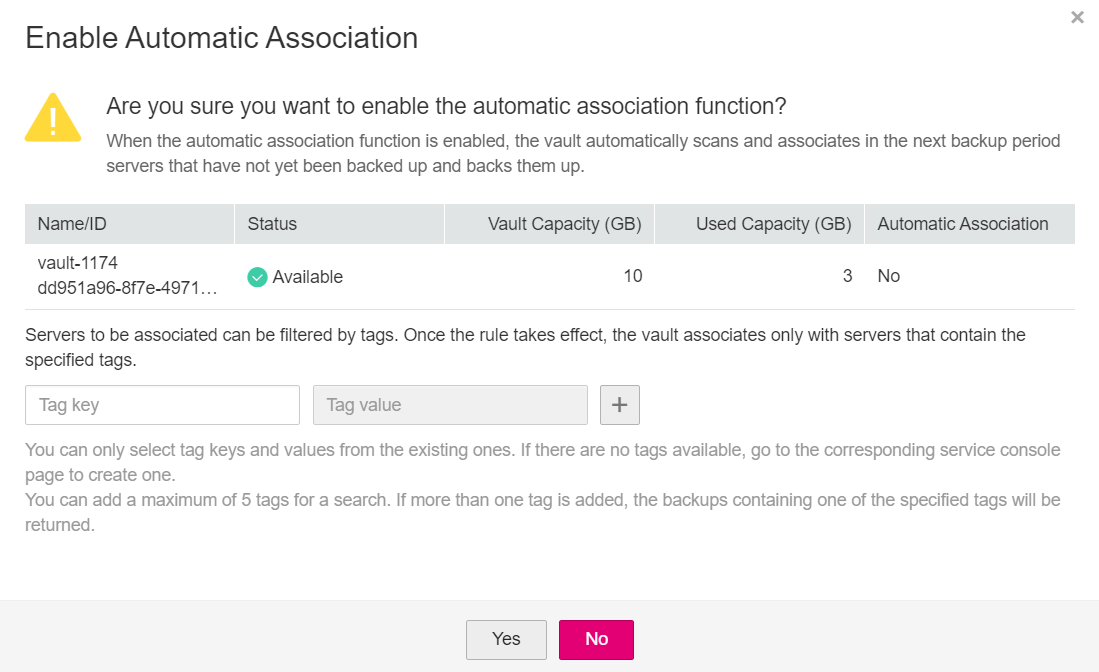
Choose More > Enable Automatic Association in the Operation column of the vault.

Check that Automatic association is displayed in the Associated Servers column of the vault list.
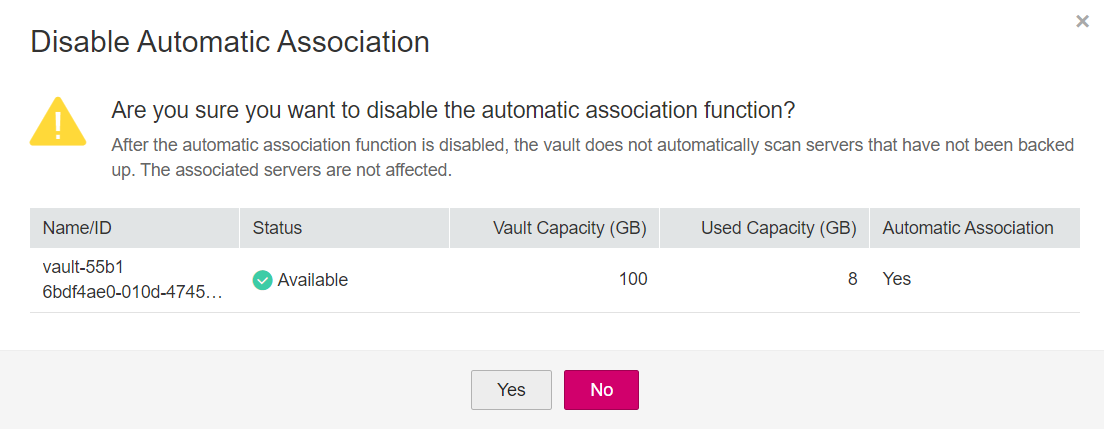
(Optional) If automatic association is not required, choose More > Disable Automatic Association in the Operation column of the vault. See Figure 2.
Figure 2 Disabling automatic association
